John McCormack DBA

SQL Server Databases and Cloud

  • Personal
    • About
  • Free Training
    • SQL Server on Amazon RDS (Free Course)
    • Free practice questions to help you pass DP-900
  • Save money in Azure
    • Azure IaaS SQL Backups – Stop burning money
    • Your Azure SQL Database and Managed Instance is too big
    • Turn the cloud off at bedtime to save 70%
    • Your Azure SQL Virtual Machine might be too big
    • Save money with Azure SQL DB serverless
    • Save up to 73% with reserved instances
    • Delete unused instances to save money in Azure
  • Hire me
    • Take a look at my Sessionize speaker’s profile
    • Let me solve your SQL Server problems – No longer available
  • All posts
    • Guides
    • cost-optimization
    • SQL Server
    • Training
    • Personal
    • Azure
    • T-SQL
    • AWS RDS
    • AWS SQL Server

Deleting data from a data warehouse

9th January 2018 By John McCormack Leave a Comment

t-sql tuesday logoThis post about deleting data from a data warehouse is my first post in the #tsql2sday series.  This month’s host is Arun Sirpal. (blog)

T-SQL Tuesday #98 – Your Technical Challenges Conquered

Please write about and share with the world a time when you faced a technical challenge that you overcame.

Deleting data from a data warehouse

I was tasked with deleting a large amount of data from our data warehouse. This was because we had sold off a small part of our company (based in a different country) and as such, all associated data had to be removed from our data warehouse. The data warehouse pooled the data from our various OLTP data sources and stored it in one data warehouse.

Challenges

  • Find out the scope of the data
  • Identify the data to be purged
  • Identify the order for the purge to take place
    • Why was this important?
  • Create a process for deleting data that will not interfere with our daily loads
  • Test, and then deploy with confidence
Find out the scope of the data & Identify the data to be purged
  1. I had to identify which tables held the data. I created a tracking table and inserted the names of all of the tables in our two databases which held customer data.
  2. Looping through all of the tables, I identified which tables had 0 rows where sourceid = 5 and marked these as completed in my tracking table.
  3. The remaining tables containing rows where sourceid = 5 would be the tables where the purge was needed.
Identify the order for the purge to take place

It was not possible or practical to just delete the data based on a list of table names where data was held. I had to consider referential integrity and identify a precedence order in which to carry out the deletes, table by table. Many of our tables had Foreign Key constraints so SQL Server simply prevents you from deleting out of order. Some of our tables had multiple Foreign Key relationships and some went down through many levels. This made determining the order of deletions a difficult task.

Explanation:
If you try to delete a row in a primary key table, the delete will fail when the primary key value corresponds to a value in the foreign key constraint of another table. To make this change, you must do your delete of the foreign key data in the foreign key table first, and then delete from the primary key table.

I wrote a stored procedure which reviewed all of the foreign keys in the database and identified the correct order in which tables could be deleted from. Some tables had no foreign key relationships so these could be done in any order. They were the lowest precedence and were done first. The next set of tables were those foreign key tables referenced by a table with a primary key, but did not reference any other tables. These tables were processed next. This process continued on creating a hierarchy which eventually allowed me to identify the correct order in which the tables could be processed.

Create a process for deleting data that will not interfere with our daily loads

Over the years I have used SSIS for many large administration projects. It is useful where a complex workflow has to be identified and where there are many moving parts. SSIS can do so much more than just ETL. With this in mind, I created an SSIS package which  would contain all of the code.

A main outline of the SSIS package

Steps to create objects only do so if the object doesn’t already exist.

  • Create and pre-populate (with table names and expected row counts) a metadata tracking table. As the package was running through, this would allow me to tell at a glance how many rows had been deleted, how many tables had been completed and how far the task had progressed overall. This information was important and also allowed me to provide regular updates to management.
  • Create a stored procedure which would determine the order in which tables should be purged.
  • Run the stored procedure and update the metadata tracking table with the precedence values.
  • Delete the rows. The deletes would be done one table at a time, in optimised batches following the precedence order set out in the metadata tracking table to prevent error. The number of rows deleted for each table was updated in the tracking table.

With the package created, I set up a SQL Agent Job and set a schedule for times outside of the data loads. I also added in a step to ensure the loads were not still running when the job went to run.

Test, and then deploy with confidence

With a process created that worked, I had to set about testing it on a large scale to ensure a smooth process by the time my package was going to target our production database. Fortunately, we had 4 full scale dev and QA environments, each of them had a full set of data. There were slight differences in data volumes due to refresh dates, and also some newer tables existed that weren’t in production.

Having so many environments allowed me to focus on batch size to get the most efficient number of rows to delete per run. I set this as a user variable in SSIS which allowed me to pass in the value via the agent job step. If I felt it needed adjusted, I could just adjust the job step without amending the package.

Overall Result

The production run completed over a couple of weeks. In that time, several billion rows of data over hundreds of tables were deleted.

Alternative options

As I was confident all related data would be deleted, I could have disabled the Foreign Key constraints and deleted in any order. I decided against this for the following reasons.

  • The full purge would take two weeks. As each of the tables also held data that should remain, and also because we would still be running daily loads, I felt this was unacceptable as it could lead to periods of time where the referential integrity was in doubt.
  • I could forget to re-enable some constraints.
  • Once re-enabled, the foreign key constraints would be untrusted. They would need to be checked to reset the is_not_trusted value to 0 in sys.foreign_keys.

Filed Under: front-page, Guides, T-SQL Tagged With: #tsql2sday, tsqltuesday

EC2 SQL Server Backups to Amazon S3

22nd December 2017 By John McCormack 8 Comments

How to write your EC2 SQL Server Backups to Amazon S3

How to write your EC2 SQL Server Backups to Amazon S3This post specifically discusses how to write your EC2 SQL Server Backups to Amazon S3. It should not be confused with running SQL Server on RDS which is Amazon’s managed database service. To back up to S3, you will need to have an AWS account and a bucket in S3 that you want to write to. You’ll also need a way of authenticating into S3 such as an access key or IAM roles.

Background

Recently, I have been investigating running SQL Server in Amazon EC2. One issue to resolve is where to store database backups. Amazon S3 is far cheaper and has much higher redundancy than Amazon EBS (Elastic Block Store) so storing the backups here is an attractive idea. Furthermore, we can use rules in S3 to auto delete old backups or move them to Glacier which is cheaper than S3 Standard. However,  there is no obvious or inbuilt way to write your EC2 SQL Server Backups to Amazon S3 directly.

Example Costs as of December 2017 (US-EAST-1 Region) for storing each Terabyte of backup.

EBS – General purpose SSD Amazon S3 Amazon Glacier
$1228.80 $282.62 $49.15

Why is this a problem? (Block storage vs object storage)

SQL Server expects to be able to write backups to a file location (block storage) but S3 is Object Storage. This makes S3 unsuitable for direct backups. Newer versions of SQL Server (2016 onwards) also allow a BACKUP DATABASE TO URL option but this is designed for Microsoft Azure Blob Storage and as such, an S3  bucket cannot be used as the URL.

As such, we need a method to get the file into S3, either directly or indirectly because the storage cost is so much cheaper than EBS. Amazon recommend using File Gateway but this involves running another EC2 machine. This isn’t cost effective or easy to implement so I’ve discarded this method for now. The two options which I have tried and tested are below, they both have their pros and cons. I’ve also listed 3 other methods which may help you write your EC2 SQL Server Backups to Amazon S3 directly but these are untested by me as I rejected the approach.

A note on Ola

The Ola Hallengren backup solution (link) works well in EC2 when writing to EBS storage as this is just treated like a local drive. It also works well if writing to Azure Blob Storage. Whilst it also works with 3rd party backup tools such as LiteSpeed, it doesn’t cater for the latest LiteSpeed functionality that does allow writes directly to S3. I have written to Ola to ask if this is something that could be considered for a future release but until then, I am unable to use Ola’s solution.

Option 1 – Write to EBS and Sync with S3

Take a database backup using t-sql. Better still, schedule a job via SQL Agent to run at a set interval.

BACKUP DATABASE [Test]
TO DISK = N'D:\MSSQL\BACKUP\Test.bak' WITH NOFORMAT,
NOINIT,
NAME = N'Test-Full Database Backup',
SKIP,
NOREWIND,
NOUNLOAD,
STATS = 10

Using the AWS command line, copy the backup from your EBS volume to your S3 bucket. This should be step 2 of your agent job.

aws s3 sync D:\MSSQL\BACKUP s3://sqlpoc-backups/prod-backups

Delete the backup on EBS so the space will be available for the next backup. I have used PowerShell to do this but you can choose any method you prefer. This should be step 3 of your agent job.

remove-item D:\MSSQL\BACKUP\* -Recurse

Note: When sizing your EBS volume, it needs to be at least the size of your biggest database backup (with some room for growth). If this is the size you choose, bear in mind you can only back up one database at a time. If you size the drive bigger, you can back up more databases in the same job before syncing with S3 however this will be more expensive. With EBS, you pay for the size of the volume allocated, not just what is used. This is different to S3 where you only pay for data stored.

Option 2 – Write directly using LiteSpeed

Quest LiteSpeed is a 3rd party product for backing up SQL Databases. One very useful feature of enterprise edition is that it allows you to backup directly to Amazon S3. This is huge because it takes away the need for any intermediate storage, VMs or other services. It pushes your backup directly to the desired bucket location in S3. To do this, you’ll need to add a few new parameters to your backup calls but overall, it’s saves a load of hassle.

Note: This isn’t an ad for LiteSpeed, my decision to use it is down to my company already having a license agreement with Quest. If I didn’t have this in place, I would more than likely go with option 1, ultimately cost would be the deciding factor unless the difference was small.

Before writing your t-sql for the backup job, you will need to add your cloud account details to the LiteSpeed desktop app. Here you will need to pass in your Cloud Vendor, Display name, AWS Access Key, AWS Secret Key, region, storage class and bucket name.

exec master.dbo.xp_backup_database
@database = N'Test',
@backupname = N'Test - Full Database Backup',
@desc = N'Full Backup of Test on %Y-%m-%d %I:%M:%S %p',
@compressionlevel = 7,
@filename = 'test-backups/Test-Full.bkp', -- folder name within bucket defined here
@CloudVendor = N'AmazonS3',
@CloudBucketName = N' sqlpoc-backups',
@CloudAccessKeyEnc = N'xxxxxxxxxxxx’, -- an encrypted version of your access key (generated by LiteSpeed app)
@CloudSecretKeyEnc = N' xxxxxxxxxxxx, -- an encrypted version of your secret key (generated by LiteSpeed app)
@CloudRegionName = N'us-east-1',
@UseSSL = 1,
@OLRMAP = 1 ,
@init = 1,
@with = N'STATS = 10',
@verify = 1

As Amazon S3 is object storage, it does not support appending to an existing file so if using the same name each time for your backups, the previous backup is deleted and replaced. If you turn on versioning in your S3 bucket, you can keep old versions of the same filename. Or if each backup has a unique name (due to time stamp being appended), it will save them side by side. Do remember to have Object Lifecycle Rules turned on for all or specific items in your bucket to either delete old backups or send them to the much cheaper Glacier storage tier. If you don’t, your bucket size will grow very quickly and costs will escalate.

Option 3 – Map s3 bucket as a drive

If only this was easy. Doing this natively is not possible as far as I can tell. This comes down to a difference in storage types. S3 is object storage and for a drive, we need block storage. That said, there a number of 3rd party solution which I have not tested that seem to offer this service. A quick google suggests CloudBerry and Tntdrive as the most popular providers.

Option 4 – File Gateway/Storage Gateway

When investigating methods for saving my backups to S3, AWS support recommended using File Gateway. This would certainly overcome the technical challenge of getting the files into object storage (S3) as it allows you to mount an NFS Volume, but it adds complexity and cost to the process. File gateway is very useful as a method of connecting an on-premises appliance to cloud based storage however as the instances were already in the cloud (EC2), I didn’t feel like this was a very satisfactory solution.

Option 5 – Other 3rd Party tools

Other 3rd party tools exist such as CloudBerry which allow but I have not looked into them in detail. Prices start around $150 per server but they do offer volume discounts.

Useful references

https://docs.microsoft.com/en-us/sql/relational-databases/backup-restore/sql-server-backup-to-url

https://support.quest.com/technical-documents/litespeed-for-sql-server/8.6/user-guide/8

How do you write your EC2 SQL Server Backups to Amazon S3?

If you use another method listed not here, I’d be delighted to hear about it in the comments. 

IT Certification Category (English)728x90

Filed Under: AWS, AWS EC2, AWS SQL Server, front-page, Guides Tagged With: aws s3, backup, backup to aws s3, backup to s3, litespeed, sql backup

SQL Server Glasgow Meetup

14th December 2016 By John McCormack Leave a Comment

sql server replication basicsI had the pleasure of speaking at last night’s SQL Server Meetup in Glasgow. It was a fairly relaxed affair and I hope that the session was enjoyed by those who attended.

I presented “A guide to SQL Server Replication, how to fix it when it breaks and alternatives to replication“. The slides are pitched at a basic level and don’t dive too deep into replication but give an overview of the different types of replication plus the key replication components.

As promised, I have made the slides available for download.

I also enjoyed doing the replication demo which worked but the content of that is not set out in a step by step fashion so I’ll work on that and aim to share it as soon as I get the chance. I focused the demo on setting up transactional replication and the importance of scripting it out so it is repeatable. I also showed how to use Replication monitor, how to use tracer tokens & how to query the distribution database for errors. There’s more info on that in this blog post.

Thanks to all who attended and thanks to Robert French for hosting.

Filed Under: front-page, Guides, Personal

Configuring TempDB for SQL Server 2016 instances

14th December 2016 By John McCormack 1 Comment

Configuring TempDB for SQL Server 2016 instances

Configuring TempDB for SQL Server 2016As I troubleshoot performance problems with SQL Server, I often find that the configuration of the TempDB system database can be a cause, or a major contributor to poor performance. It is amongst the most prolific offenders and is an easy fix. In previous versions of SQL Server, TempDB was a bit of an afterthought when it came to installation however with SQL Server 2016, you can set it up the way you want from the outset, albeit with some minor restrictions.

Best practice for TempDB

Set aside 1 drive for TempDB data and log files and have nothing else on there. In some very high transaction environments, you could also consider putting the TempDB log file on its own drive but this isn’t usually needed.

Start with 8 data files for TempDB as this is the most up to date advice. Even if your server has a far higher number of cores, 8 data files should still be sufficient. If performance isn’t great and if you receive page contention, increase the number of data files. (Increasing by 4 at a time is a good number to work with). In the unlikely scenario that your server has less than 8 logical cores, then only create 1 data file for each core. You should not have more data files than cores.

Size all the files equally to avoid the allocation contention issue discussed in this Microsoft KB. This also ensures any growth will be equal amongst all data files. (More about growth below)

Forget about growth. If you do set one drive aside for TempDB, it makes no sense to leave a ton of spare space lying around to allow TempDB files to grow into at a future date. Instead, just grow the data files and log file out to fill the drive.  Some people aren’t comfortable using all the space. If you want to leave a buffer, use at least 95% of the available space. Once the files are pre-sized, just cap them and you won’t need to worry about growth again.

Configuring TempDB during installation

As I mentioned earlier, in previous versions; TempDB may have seemed like an afterthought as it was not mentioned in the installation wizard. However, this has changed in SQL Server 2016 as setup.exe now gives a tab for configuring TempDB from the outset. You should amend the values in this tab and not rely on the default values offered by Microsoft.

The TempDB database should be configured as follows:

  • Number of data files should be set to the number of cores available for the instance or 8, whichever is lower. So in an 8 core or more server, this should be set to 8.
  • Depending on the size of your TempDB drive, the initial data file size should be around one ninth of the available space. The GUI Caps this at 1024MB so we will need to change in T-SQL after installation if you want bigger files than this.
  • Set the Data directory to the dedicated drive you have chosen. If you manage multiple environments, try to standardize this as much as possible across all servers.
  • Like step 2, the initial TempDB log size should be set around one ninth of the available space. This is also capped at 1024MB so this may also need to be changed after installation if you want bigger files than this.

Fixing TempDB files to fill drive after installation

As I mentioned, for 8 data files and 1 log file, each should be around one ninth of the available drives space. As the setup GUI limits drive size to 1024 MB, we need to make some changes. The script below sets each of the 8 data files and the log file to 4GB and it stops autogrowth. If you set up your TempDB like this, it shouldn’t require much tlc.

-- Set all data files and log file to same size and prevent autogrowth
GO
ALTER DATABASE [tempdb] MODIFY FILE ( NAME = N'tempdev', SIZE = 4194304KB, FILEGROWTH = 0 )
GO
ALTER DATABASE [tempdb] MODIFY FILE ( NAME = N'temp2', SIZE = 4194304KB, FILEGROWTH = 0 )
GO
ALTER DATABASE [tempdb] MODIFY FILE ( NAME = N'temp3', SIZE = 4194304KB, FILEGROWTH = 0 )
GO
ALTER DATABASE [tempdb] MODIFY FILE ( NAME = N'temp4', SIZE = 4194304KB, FILEGROWTH = 0 )
GO
ALTER DATABASE [tempdb] MODIFY FILE ( NAME = N'temp5', SIZE = 4194304KB, FILEGROWTH = 0 )
GO
ALTER DATABASE [tempdb] MODIFY FILE ( NAME = N'temp6', SIZE = 4194304KB, FILEGROWTH = 0 )
GO
ALTER DATABASE [tempdb] MODIFY FILE ( NAME = N'temp7', SIZE = 4194304KB, FILEGROWTH = 0 )
GO
ALTER DATABASE [tempdb] MODIFY FILE ( NAME = N'temp8', SIZE = 4194304KB, FILEGROWTH = 0 )
GO
ALTER DATABASE [tempdb] MODIFY FILE ( NAME = N'templog', SIZE = 4194304KB, FILEGROWTH = 0 )
GO

Have fun configuring TempDB for SQL Server 2016 and I hope this was helpful. Any comments or suggestions as always, will be greatly appreciated.

IT Certification Category (English)728x90

Filed Under: front-page, Guides

Search and replace inside SSIS package

3rd November 2016 By John McCormack 1 Comment

Search and replace inside SSIS package

replace all in notepad
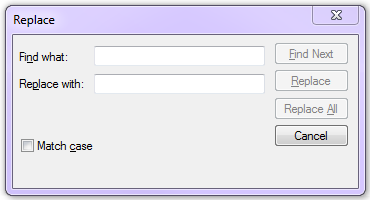
I had the situation recently where I needed to search and replace a string inside an SSIS package. The reason for this was about 25 Execute SQL tasks within the package all included some hard coded T-SQL that pointed at a decommissioned network share.  I needed to change the T-SQL in each task to point to a new network share. I know the package should have used a variable for this but I needed a quick fix.

If you realise that your SSIS package is simply just some XML which is made to look graphical by SSDT or BIDS, it becomes clear that this is a very simple process. It is just like doing a replace all in notepad which most people will have done many times. This is much easier and quicker than manually opening each and every Execute SQL Task and making each change manually.

Steps

  1. Make a copy of your SSIS package (just in case)
  2. Right click on the .dtsx file and choose Open with -> Notepad
  3. In notepad, press Ctrl-H
    1. Put the old value in Find What
    2. Put the new value in Replace with
    3. Click Replace All
  4. Save your package
  5. Open in SSDT or BIDS to confirm your changes have worked.


Filed Under: front-page, Guides Tagged With: bids, SQLNEWBLOGGER, ssdt, ssis

  • « Previous Page
  • 1
  • …
  • 3
  • 4
  • 5
  • 6
  • 7
  • Next Page »

John McCormack · Copyright © 2026